


How to Use the AVPlayerHD
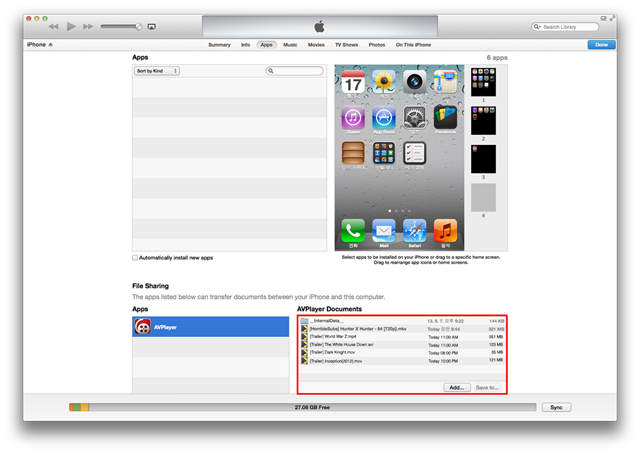
1. Transferring files to AVPlayerHD from iTunes
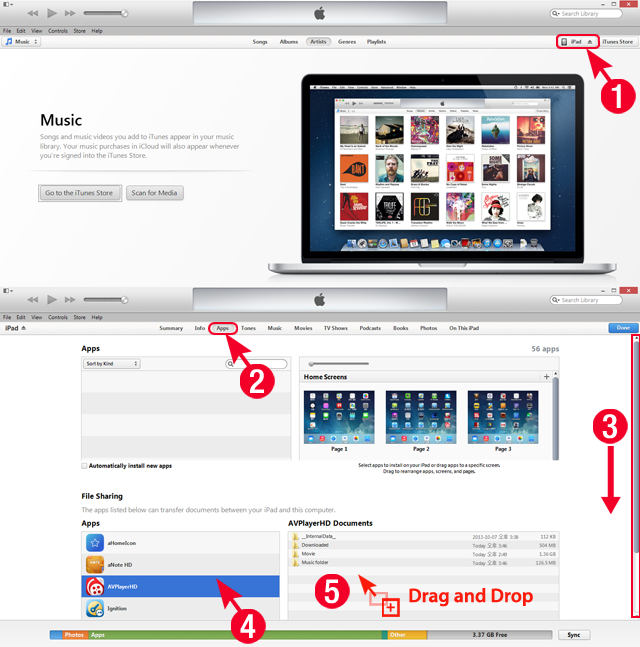
- Launch iTunes and connect your device to a computer with the USB dock cable
- Click Apps on the top
- Scroll down using the scroll bar on the right (if the scroll bar appears on the screen)
- Click AVPlayerHD in the Apps on the left lower corner.
- Add files into the AVPlayerHD Document by Dragging & Dropping the file or clicking on the Add Button.
2. Transferring files to AVPlayerHD from Wi-Fi
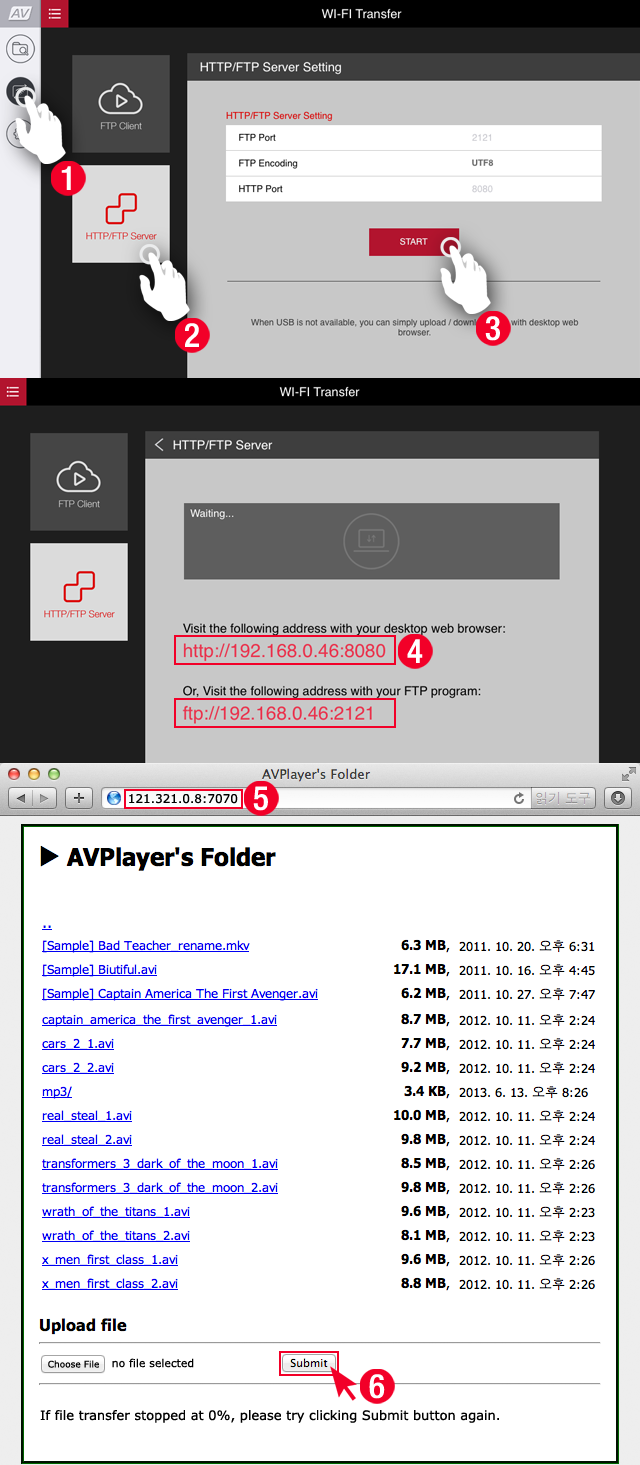
- Click on the Menu button > click on the Wi-Fi button
- Click on the HTTP/FTP Server button
- Click on the START button
- On the computer which is on the same network as your iPad, input the address that appears on the HTTP/FTP server transmission screen on your web browser.
- A web page which enables uploads to your iPad will appear. Select the desired file and click Submit to directly upload the file to your iPad.
- If file transfer stopped at 0%, please try clicking Submit button again.
3. FTP Client
3-1. FTP Client Setting
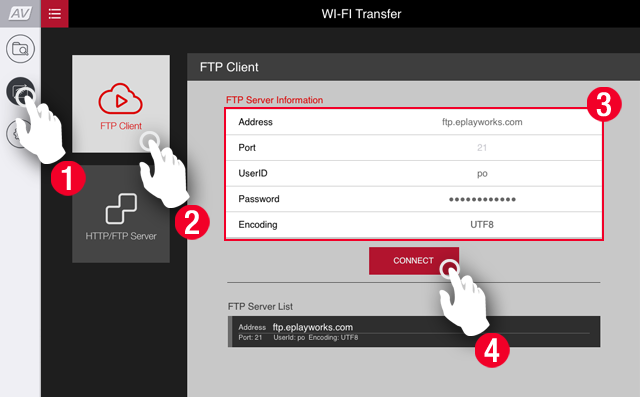
- Click on the Menu button > click on the Wi-Fi button
- Click on the FTP Client button
- Input the information of the FTP server you wish to connect to.
- Click on the CONNECT button
3-2. Download(Server -> iPad)
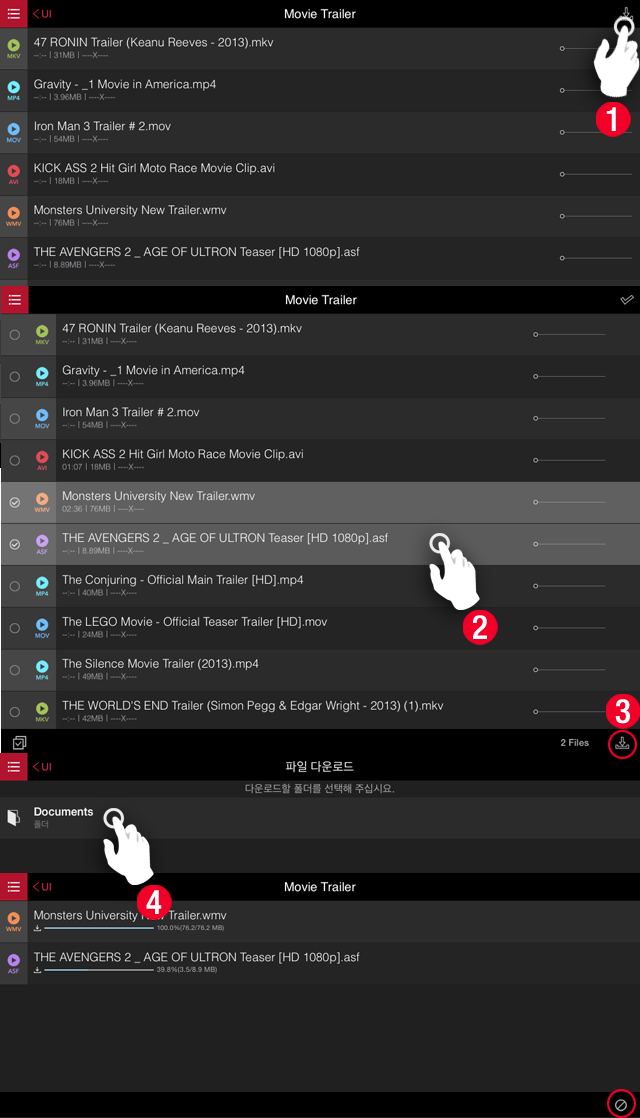
- After connecting to the FTP server, click on the download button
- Select the file you wish to download
- Click on the download button
- Select the folder you wish to download your files to from the list of folders in your current Document folder.
- Show download progress
You can cancel the download by clicking on the cancel button located on the bottom right.
3-3. FTP Streaming
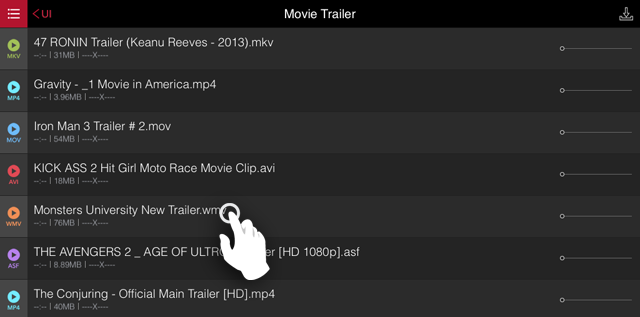
- Select file name to stream after connected to FTP Server.
- Playback the selected file. This is streaming.
3-4. FTP Server List Configration
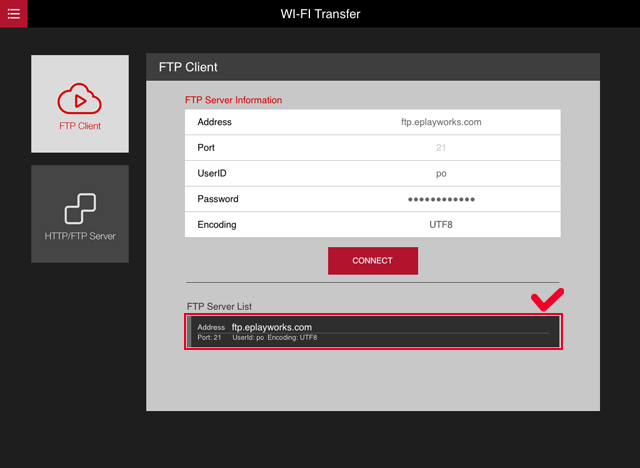
- Once connected the server as shown above, it is automatically added to the list.
3-5. FTP Server List Deletion
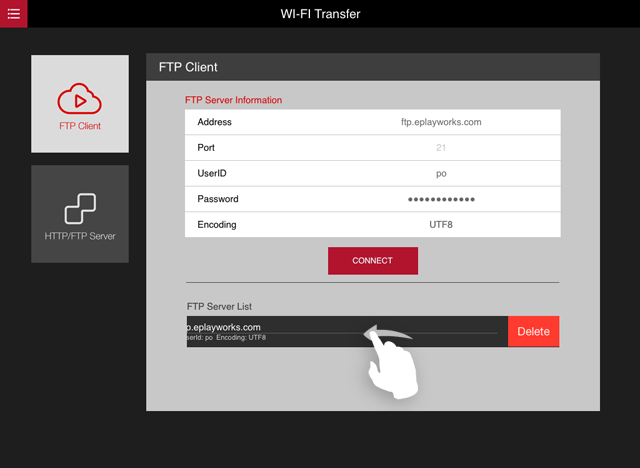
- If you want to clear the list of the server, as shown above swipe to the left and, press the delete button.
4. Player
4-1. How to Use the Player
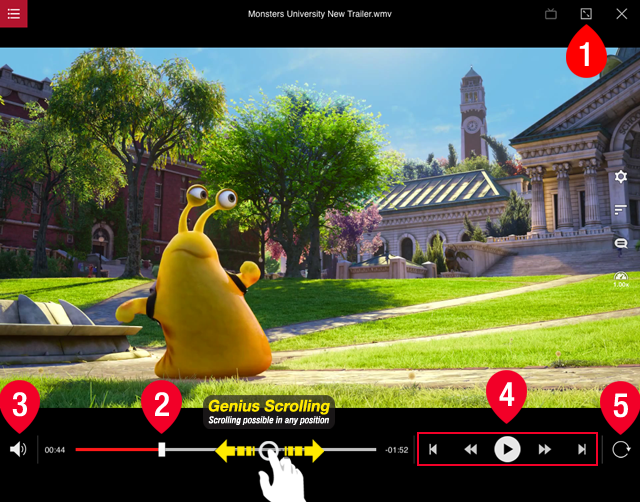
- Screen Ratio chaning button (4:3 / 16:9 / Full Screen)
- Scrubbing bar
- Volume Control
- Review / Playback(Pause) / Fast Forward
-
Screen Rotation Lock / Release button
If screen does not rotate, release the vertical view lock on the IPad. - Genius Scrolling You can quickly and easily move to your desired scene by touching anywhere on the playback bar and swiping to the right or left.
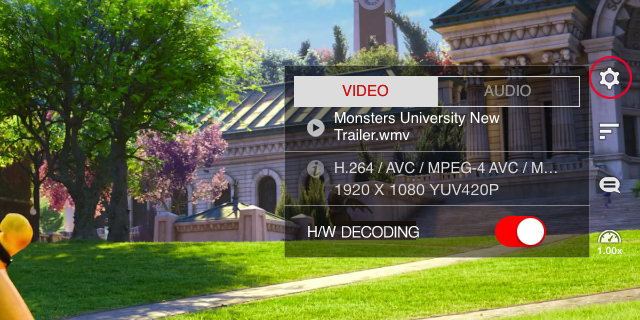
- You can view information relating to the video of the file that is playing and turn on and off the H/W decoding.
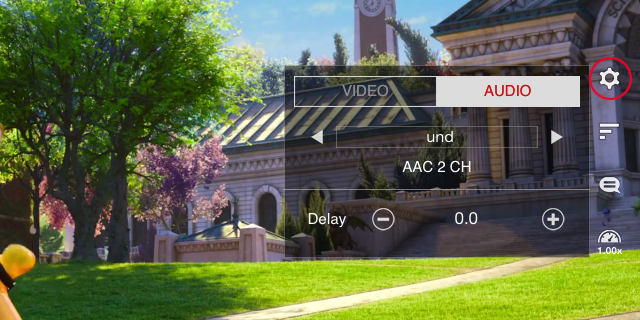
- You can view information relating to the audio of the file that is playing and can select voice sounds if multichannel sound is available for such file.
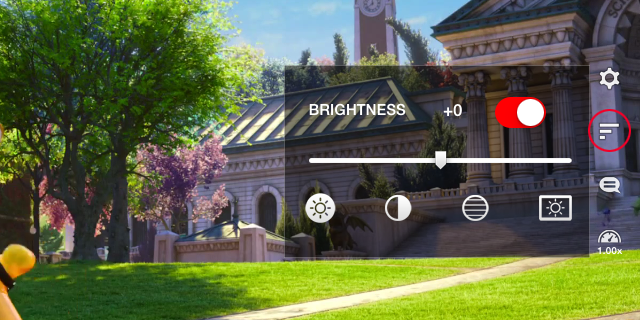
- You can adjust the color.

- You can turn on and off subtitles and adjust the sync rate of subtitles by clicking on the + or – button.
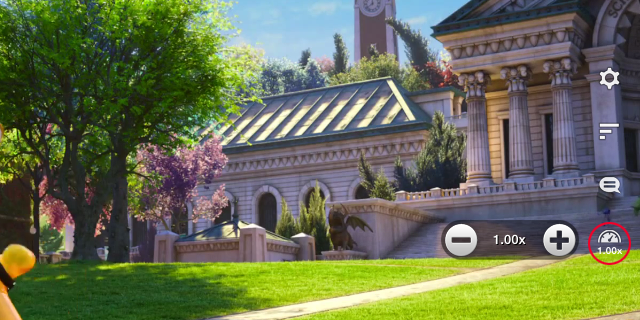
- You can adjust the playback speed by clicking on the + or – button.
4-2. Music Player
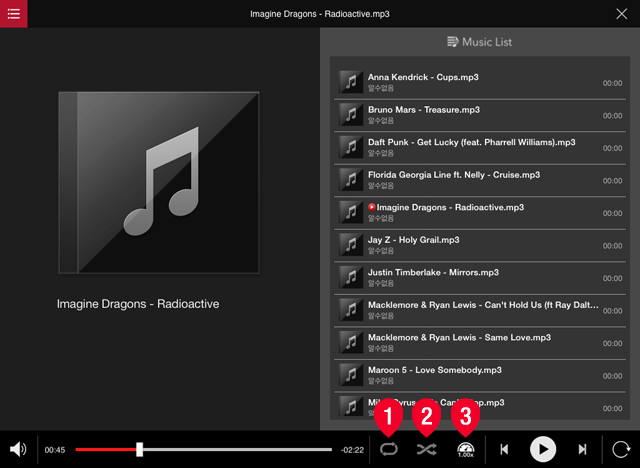
- When music files are selected in the media explorer, Music player is automatically to be run by collecting music files in thefolder at the moment of clicking.
- Shuffle/Playing in order, Repeating all/ Repeating one song, the list of playing are in place.
4-3. Folder Password Setting
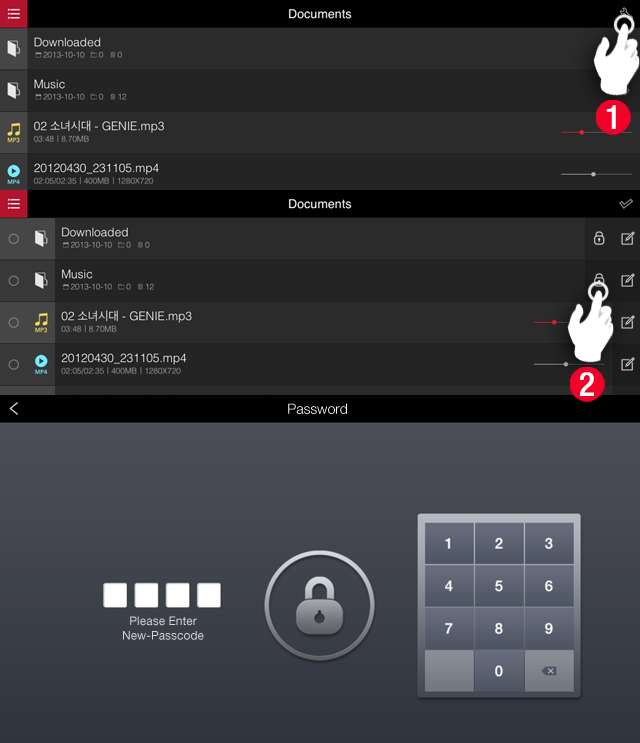
- Click on the edit (spanner) button in Media Explorer
- Click on the lock button on the right side of the folder list.
- Set password
A window to input the password on the initial set up will appear.
You can remove the password setting through the same method.
4-4. Changing the File Name
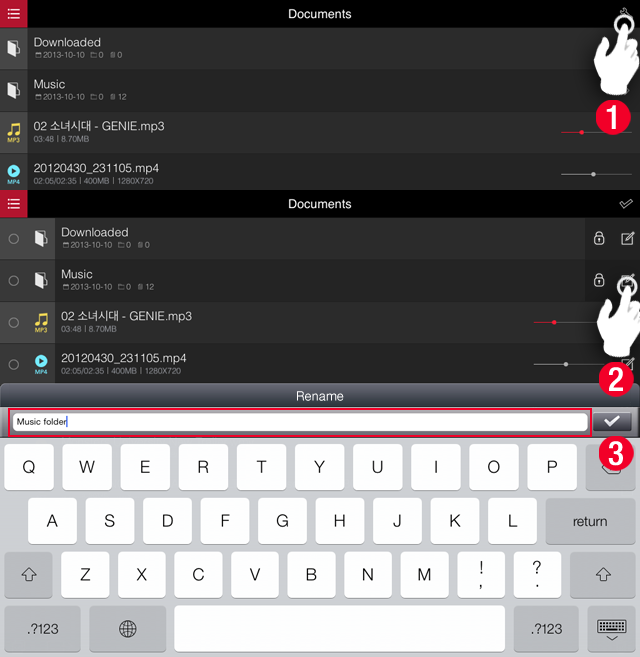
- Click on the edit (spanner) button in Media Explorer
- Click on the pen button on the far right of the folder or the file list.
- You can change the name of the folder or file with the change file name key pad.
4-5. Subtitle Encoding Setting
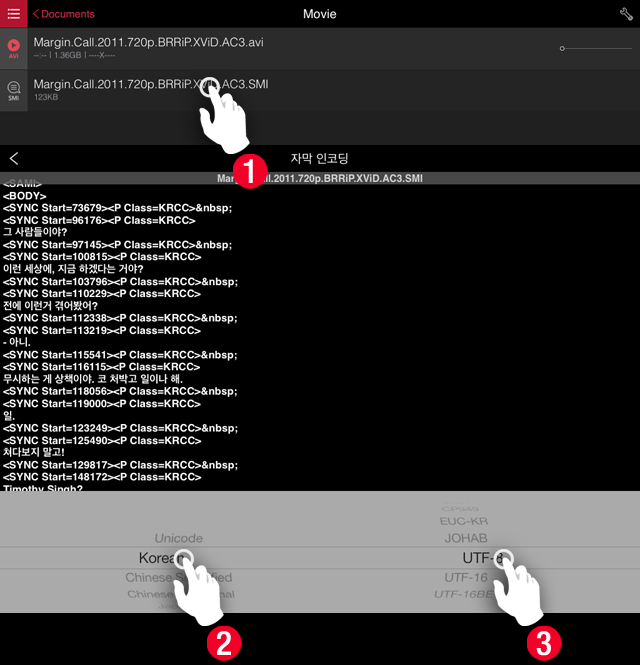
- If video and subtitle have the same name in the same folder, subtitle can be encoded.
- Encoding types vary according to the country.
4-6. Subtitle Indication Setting
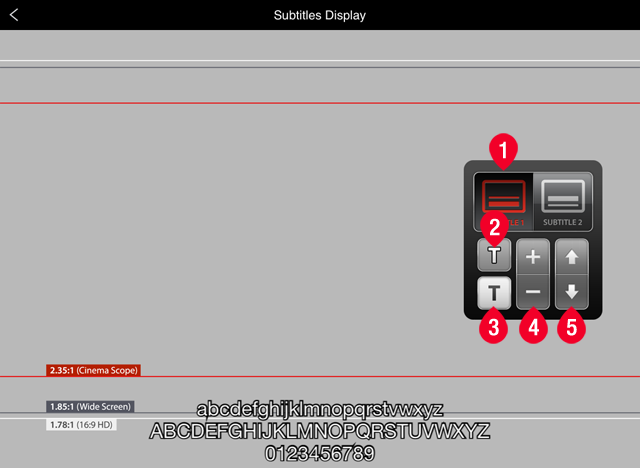
- Click Subtitle Indication in Setting.
- Subtitle Effect ( Outline / Shadow )
- Subtitle Color ( Black / White )
- Subtitle Size
- Subtitle Location Setting
4-6. Disabling iTunes and iCloud backup option
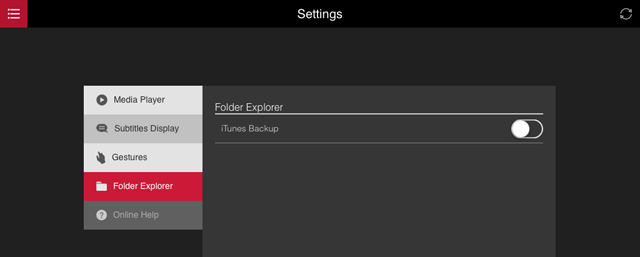
- iTunes backup was taking long time and a lot of space if you have many files in AVPlayerHD's documents folder. Now you can control to back up or not to back up of AVPlayerHD's file by turn on or off the [iTunes backup] option. AVPlayerHD's document folder will not be backed up by iTunes or iCloud while [iTunes backup] option is off.
- However, if you turn off the [iTunes backup] option, you won't be able to see the file inside of AVPlayerHD's document folder so if you wish to see the file then you need to turn back on [iTunes backup] option.


